어느정도 형태가 갖춰진 HTML, CSS를 수정하고 커스터마이징은 여러번 해봤지만, 밑바닥부터 HTML과 CSS를 만들어 사용해본적은 없다. 그래서 어느정도 구성된 HTML템플릿을 다운받아 입맛에 맞게 커스터마이징 할 예정이다.
HTML5 UP
Responsive HTML5 and CSS3 site templates designed by @ajlkn and released under the Creative Commons license.
html5up.net
위 링크를 클릭하여 이동한다.

1.해당파일 전부를 workspace/src/main/resources/templates 하위에 붙여넣고. 서버를 재시작한다.

에러화면이 나온다.
그 이유는 resource의 정적파일(image, html등)은 /resources/static하위에서 관리한다. 하지만 나는 ThymeLeaf 템플릿 엔진을 사용해야 하기 때문에 static에는 어떤 html도 넣지 않을것이다. 문제를 해결하려면 다음과 같은 작업이 필요하다.

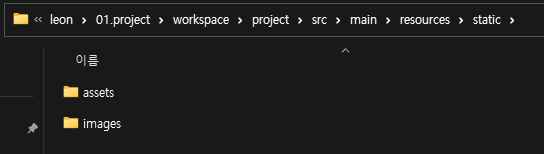
1-1 : css, image파일을 static으로 옮긴다.
1-2 : java > com > project > config 패키지생성 > 하위에 ThymeLeafConfiguration java파일 추가
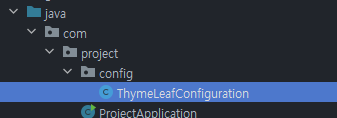
package com.project.config;

import org.springframework.context.annotation.Configuration;
import org.springframework.http.CacheControl;
import org.springframework.web.servlet.config.annotation.ResourceHandlerRegistry;
import org.springframework.web.servlet.config.annotation.WebMvcConfigurer;

import java.util.concurrent.TimeUnit;

@Configuration
public class ThymeLeafConfiguration implements WebMvcConfigurer {

    @Override
    public void addResourceHandlers(ResourceHandlerRegistry registry) {
        registry.addResourceHandler("/**")
                .addResourceLocations("classpath:/templates/","classpath:/static/")
                .setCacheControl(CacheControl.maxAge(10, TimeUnit.MINUTES));
    }
}
-> 모든 요청 /**에 대해 자원을 찾을 위치를 classpath:/templates/ 와 classpath:/static/ 로 설정 후 Spring 재기동
↓

'프로젝트[종료]' 카테고리의 다른 글
| 6. DB 설계하기(MariaDB) (0) | 2023.04.17 |
|---|---|
| 5. IntelliJ와 GitHub연동하기 (2) | 2023.04.17 |
| 3. IntelliJ환경에서 jar 빌드 및 배포 (0) | 2023.04.17 |
| 2. start.spring.io 사용법 (1) | 2023.04.17 |
| 1. 개인 프로젝트 시작 (0) | 2023.04.17 |